
In the previous example we have seen how to use Docker Compose to deploy a Node.js microservice to interact with Redis, also showing in a basic way how Redis persistence works.
Now let’s see istead how to use Kubernetes and Docker to do the same, showing also how we can easily scale up our application.
To try this example on your PC you only need to install Docker Desktop and Node.js then follow the described steps.
Create a directory for this example and inside copy the two directories from the previous example, redis-server and webservice.
1 2 3 4 | mkdir node-redis-example-3cd node-redis-example-3cp -r ../node-redis-example-2/redis-server/ .cp -r ../node-redis-example-2/webservice/ . |
Enter the redis-server directory and build our redis-server image.
1 2 | cd redis-serverdocker build -t redis-server:1.0.0 -f Dockerfile . |
Create a deploy.yml file that we will use to configure on Kubernetes a single Pod with a container running our redis-server image.
01 02 03 04 05 06 07 08 09 10 11 12 13 14 15 16 17 18 19 20 21 22 23 24 25 26 27 28 29 30 31 32 33 34 35 36 37 38 39 40 41 42 | apiVersion: apps/v1kind: Deploymentmetadata: name: redis-server labels: application: node-redis-example-3 component: redis-server type: singlespec: replicas: 1 selector: matchLabels: application: node-redis-example-3 component: redis-server type: single strategy: rollingUpdate: maxSurge: 1 maxUnavailable: 0 type: RollingUpdate template: metadata: labels: application: node-redis-example-3 component: redis-server type: single spec: containers: - image: redis-server:1.0.0 name: redis-server volumeMounts: - mountPath: /redis-data name: redis-data ports: - containerPort: 6379 name: http protocol: TCP volumes: - name: redis-data hostPath: path: /run/desktop/mnt/host/c/redis-data type: DirectoryOrCreate |
As you can see we’ve just configured the bind of the same directory used in the previous example, to store Redis persistence files: dump.rdb for RDB and appendonly.aof for AOF.
01 02 03 04 05 06 07 08 09 10 11 12 13 14 15 | containers: - image: redis-server:1.0.0 name: redis-server volumeMounts: - mountPath: /redis-data name: redis-data ports: - containerPort: 6379 name: http protocol: TCP volumes: - name: redis-data hostPath: path: /run/desktop/mnt/host/c/redis-data type: DirectoryOrCreate |
If you are using Docker Desktop on Windows with WSL 2 you actually have to configure your host directory with a different path respect the previous example even it’s the same directory on your machine.
You can read more on this official GitHub Docker Desktop issue: “Kubernetes Volumes not correctly mounted with WSL2”.
#Previouse example#Docker Compose using Docker Desktop on Windows with WSL 2 /mnt/c/redis-data#This example#Kubernetes using Docker Desktop on Windows with WSL 2/run/desktop/mnt/host/c/redis-data |
Apply the redis-server deployment configuration.
kubectl apply -f ./deploy.yml |
Create a Kubernetes Service configuration file for our redis-server.
01 02 03 04 05 06 07 08 09 10 11 12 13 14 15 16 17 | apiVersion: v1kind: Servicemetadata: name: redis-server labels: application: node-redis-example-3 component: redis-server type: singlespec: ports: - port: 6379 protocol: TCP targetPort: 6379 selector: application: node-redis-example-3 component: redis-server type: single |
Apply the redis-server service configuration.
kubectl apply -f ./service.yml |
Enter the webservice directory and build the microservice image.
cd ../webservicedocker build -t webservice:1.0.0 -f Dockerfile . |
Create a deploy.yml file that we will use to configure on Kubernetes a two replicas of our Node.js webservice.
01 02 03 04 05 06 07 08 09 10 11 12 13 14 15 16 17 18 19 20 21 22 23 24 25 26 27 28 29 30 31 32 33 34 35 | apiVersion: apps/v1kind: Deploymentmetadata: labels: application: node-redis-example-3 component: webservice name: webservicespec: replicas: 2 selector: matchLabels: application: node-redis-example-3 component: webservice strategy: rollingUpdate: maxSurge: 2 maxUnavailable: 0 type: RollingUpdate template: metadata: labels: application: node-redis-example-3 component: webservice redeploy: '1' spec: containers: - name: webservice image: webservice:1.0.0 env: - name: REDIS_SERVER_IP value: "redis-server" ports: - name: webservice containerPort: 3000 protocol: TCP |
Apply the webservice deployment configuration.
kubectl apply -f ./deploy.yml |
Create a Kubernetes Service configuration file for our webservice.
01 02 03 04 05 06 07 08 09 10 11 12 13 14 15 16 17 | apiVersion: v1kind: Servicemetadata: name: webservice labels: application: node-redis-example-3 component: webservicespec: type: NodePort selector: application: node-redis-example-3 component: webservice ports: - protocol: TCP port: 3000 targetPort: 3000 nodePort: 30000 |
Apply the webservice service configuration.
kubectl apply -f ./service.yml |
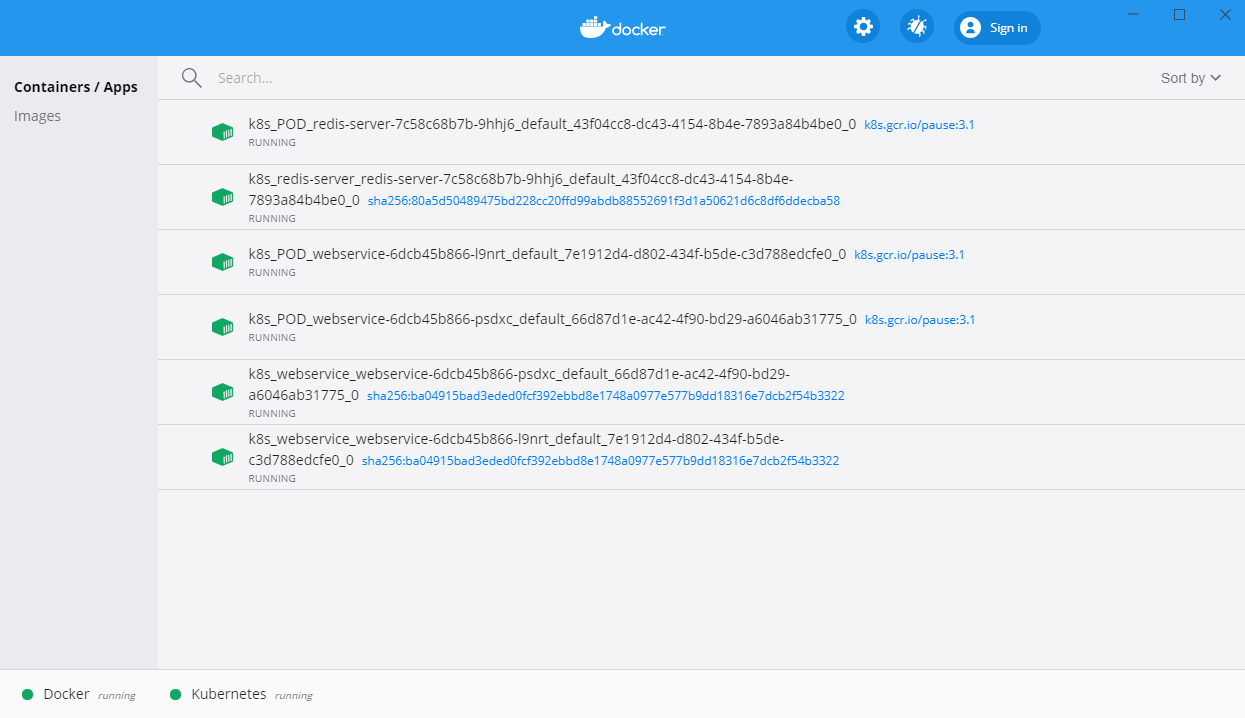
You will then be able to see the pods created and their containers in the Docker Desktop dasbboard.
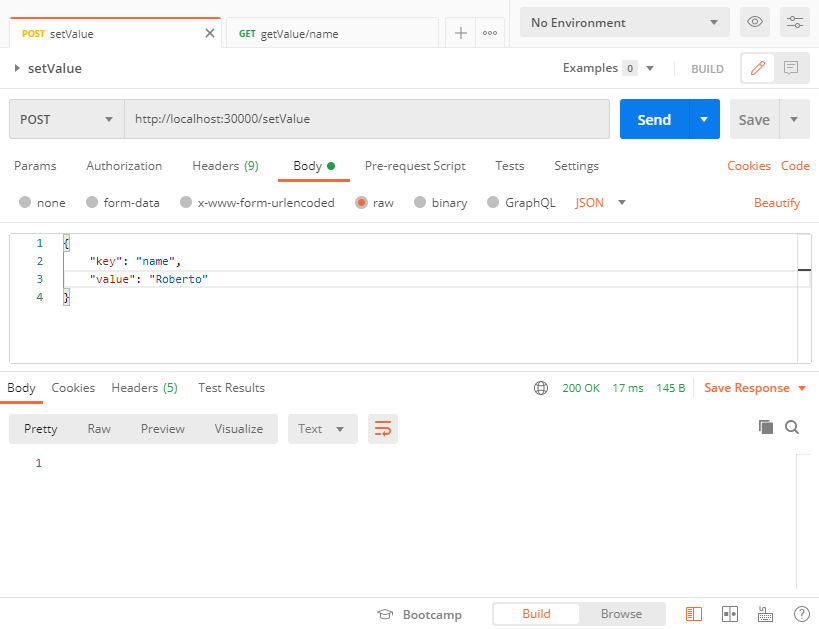
Now, as in the previous example, just using Postman we can now try to set a key value pair, we need only to change the port from 3000 to 30000, because the webservice Service type in this case is NodePort.
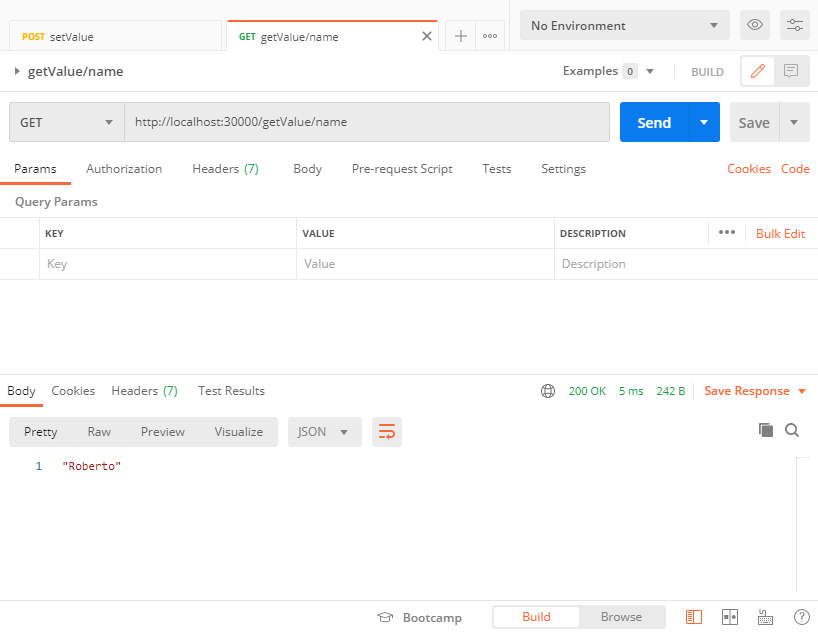
And then retrieve the saved value through its key.
The webservice Service will distribute the requests to the two replicas.
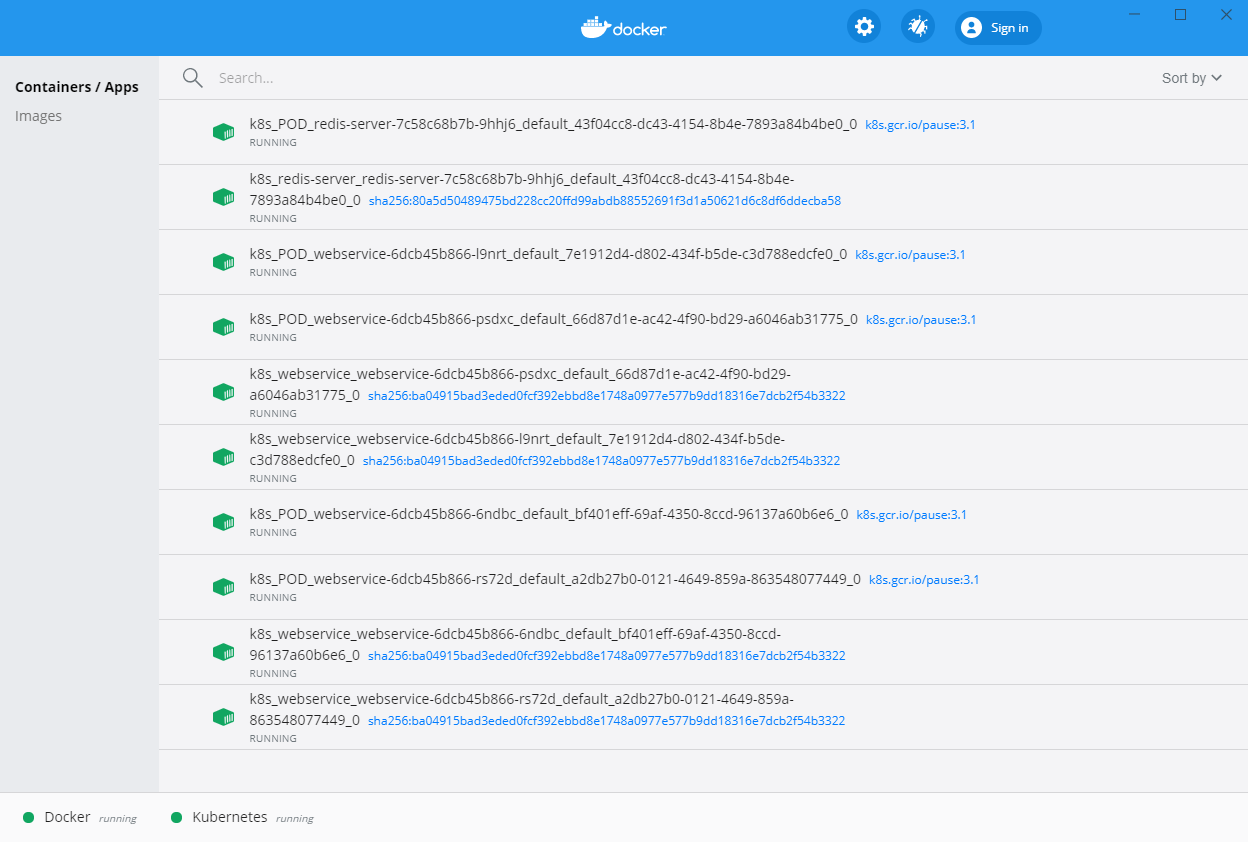
You can easily scale up the webservice replicas, for example from two pods / containers to four.
kubectl scale deploy webservice --replicas=4 |
You’ll be able to see the new pods and containers in the Docker Desktop dashboard.
You can find the source code on this GitHub repository:
https://github.com/robertobandini/node-redis-example-3
It also includes the Postman collection used and a sw-version.txt file to specify the softwares used for this project and their versions.
How we can do the load testing of this application?
What happens if we have high concurrecy calls trying to set the same key value pair?
We will talk about these arguments in the nexts posts.