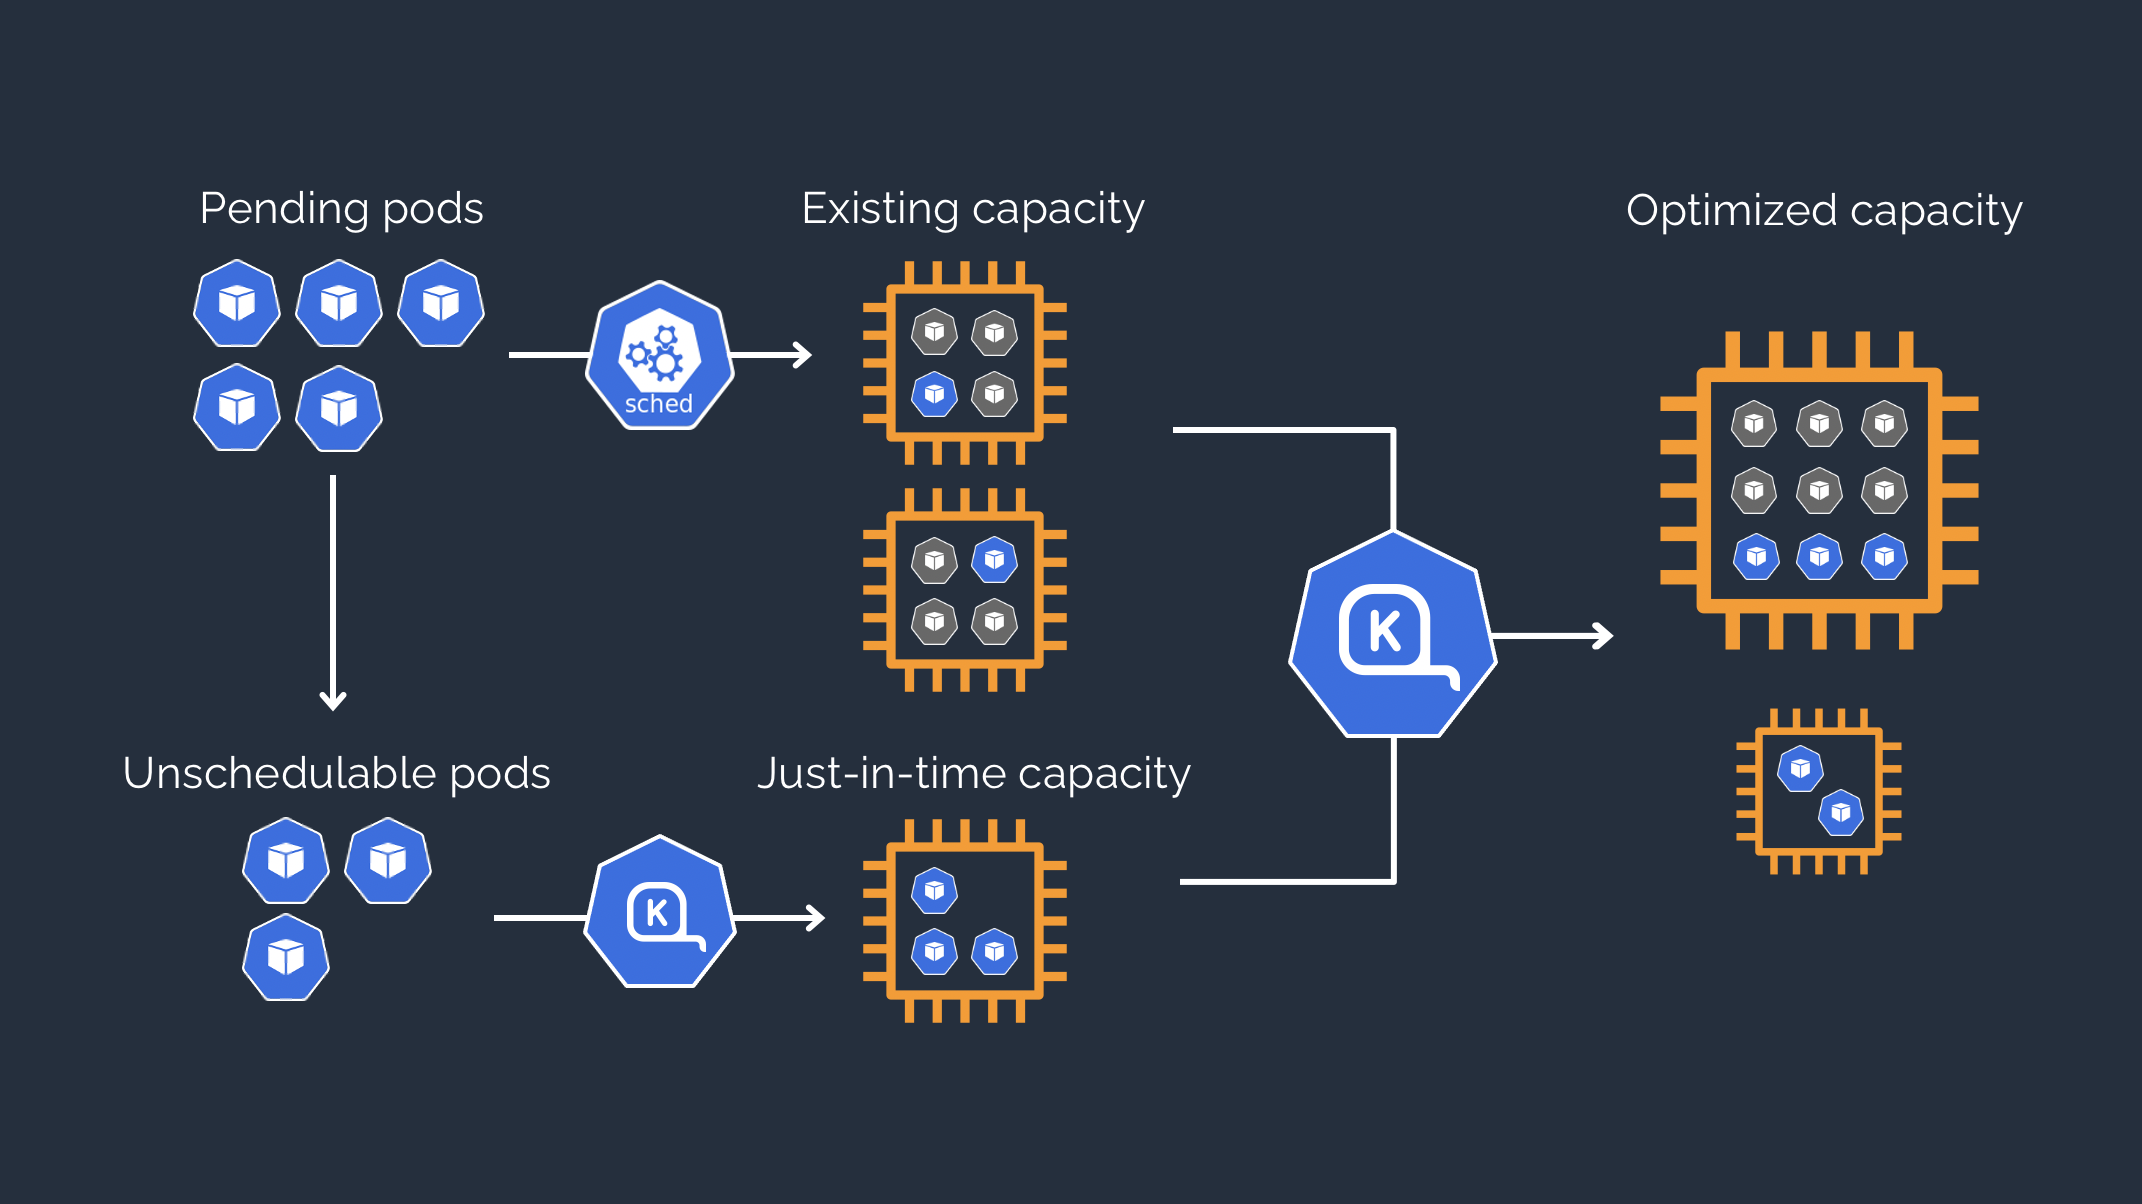
In the previous post How to create an AWS EKS cluster with VPN access using Terraform, we had deployed cluster-autoscaler on our EKS to be able to automatically scale managed node groups.
Let’s now see how to deploy Karpenter on EKS via Terraform and then how to migrate from cluster-autoscaler to Karpenter.
We do this because Karpenter is a sort of evolution of cluster-autoscaler and has several advantages: not only is it faster and allows us to go beyond the constraints of managed node groups, but it allows us to better optimize costs and make development teams more autonomous.

To deploy Karpenter on our EKS we reuse the code of the related example from the module repository used to build the EKS:
https://github.com/terraform-aws-modules/terraform-aws-eks/blob/master/examples/karpenter/main.tf
In this case I added a karpenter.tf file in the root of the Terraform project from the previous post, to install the necessary resources via a “karpenter” module and Karpenter itself via Helm Chart.
Additionally, I added a flag in locals.tf for the Karpenter deployment part, as per the cluster-autoscaler.
We then need to add tags on the private subnets used by the EKS nodes and their security group.
At this point we are ready to create our test infrastructure and try migrating pods from managed node group with cluster-autoscaler to nodepool with Karpenter.
We must not forget to have the credentials to download in this case the Karpenter chart from its repository, by running the following command.
aws ecr-public get-login-password --region us-east-1 | docker login --username AWS --password-stdin public.ecr.aws
The procedure for creating the infrastructure is similar to the previous post, with the exception that once you have connected your private VPN, you will run terraform apply again, also setting the flag that enables the deployment of Karpenter to true.
Now you have your EKS, accessible via your private VPN, with both the cluster-autoscaler and Karpenter deployed on it.
You also have two managed node groups, one system and one for workloads.
Let’s apply a Deployment of an Nginx with the tolerations for the managed node group “workloads”.
We will then see a pod scheduled on one of its nodes already turned on since the minimum is set to 1.
If the nodes were not enough, the cluster-autoscaler would add them, until reaching the maximum number of nodes of the managed node group, with the same type of instance.
cd k8s-tests
kubectl apply -f nginx-deployment.yaml
Now let’s apply some resources that will indicate to Karpenter the presence of its own node pool and a reference node class.
The node pool that we are going to indicate will have the same taints as the managed node group on which the Nginx pod is running.
apiVersion: karpenter.k8s.aws/v1
kind: EC2NodeClass
metadata:
  name: workloads
spec:
  amiSelectorTerms:
    - alias: al2023@latest
  role: Karpenter-test-karpenter-eks
  subnetSelectorTerms:
    - tags:
        karpenter.sh/discovery: test-karpenter-eks
  securityGroupSelectorTerms:
    - tags:
        karpenter.sh/discovery: test-karpenter-eks
  blockDeviceMappings:
    - deviceName: /dev/xvda
      ebs:
        volumeSize: 50Gi
        volumeType: gp3
        iops: 10000
        deleteOnTermination: true
        throughput: 125
  tags:
    team: workloads
---
apiVersion: karpenter.sh/v1
kind: NodePool
metadata:
  name: workloadss
spec:
  template:
    metadata:
      labels:
        nodegroup: "workloads"
    spec:
      nodeClassRef:
        name: workloads
        group: karpenter.k8s.aws
        kind: EC2NodeClass
      taints:
        - key: type
          value: workloads
          effect: NoSchedule
      requirements:
        - key: "karpenter.k8s.aws/instance-category"
          operator: In
          values: ["m"]
        - key: "karpenter.k8s.aws/instance-cpu"
          operator: In
          values: ["4", "8"]
        - key: "karpenter.k8s.aws/instance-hypervisor"
          operator: In
          values: ["nitro"]
        - key: "karpenter.k8s.aws/instance-generation"
          operator: Gt
          values: ["2"]
        - key: "topology.kubernetes.io/zone"
          operator: In
          values: ["eu-west-3a"]
        - key: karpenter.sh/capacity-type
          operator: In
          values: ["on-demand"]
  limits:
    cpu: 500
    memory: 500Gi
  disruption:
    consolidationPolicy: WhenEmpty
    consolidateAfter: 30s
kubectl apply -f karpenter-node-pools.yaml
In this case the node pool has 0 nodes turned on by default and even having the same taints as the managed node group, the pod with Nginx will remain scheduled on the latter.
To migrate our pod, in this case for purely demonstration purposes, we are going to directly destroy the managed node group, commenting it on Terraform and doing terraform apply.
The result will be that once the managed node group is destroyed, the pod will be rescheduled and Karpenter will create an ad hoc node based on the indications given for its node pool.
Let’s see below with Freelens the pod running again on the node created by Karpenter.
Of course you can migrate your pods to Karpenter node pools without disrupting them if you want and uninstall the cluster-autoscaler at the end.
I hope this example can help you discover the potential of Karpenter.
You can find the code in the following repository:
https://github.com/robertobandini/migrating-from-cluster-autoscaler-to-karpenter


